How to resize your photo and signature to the exact KB any exam form asks for
By Convertifyy team · · 5 min read
Short answer
To resize a photo and signature for an exam form, read the size rules in your official notice, crop the photo to the asked shape, then use Convertifyy’s Compress image to 20KB or 50KB tool. It finds the clearest version under the limit and can set exact pixels too. Nothing is uploaded.
Compress image to 20KB, free and private
Signatures and forms. Runs in your browser; nothing is uploaded.
Step by step
Step 1Open your exam’s official notice and note the photo and signature rules: file type, minimum and maximum KB, and pixel or cm size if given.
Step 2Crop the photo so your face fills most of the frame (and the signature so there’s little white space) with Crop image.
Step 3Open Compress image to 20KB or 50KB, add the file, and type the exact width and height if your notice gives them.
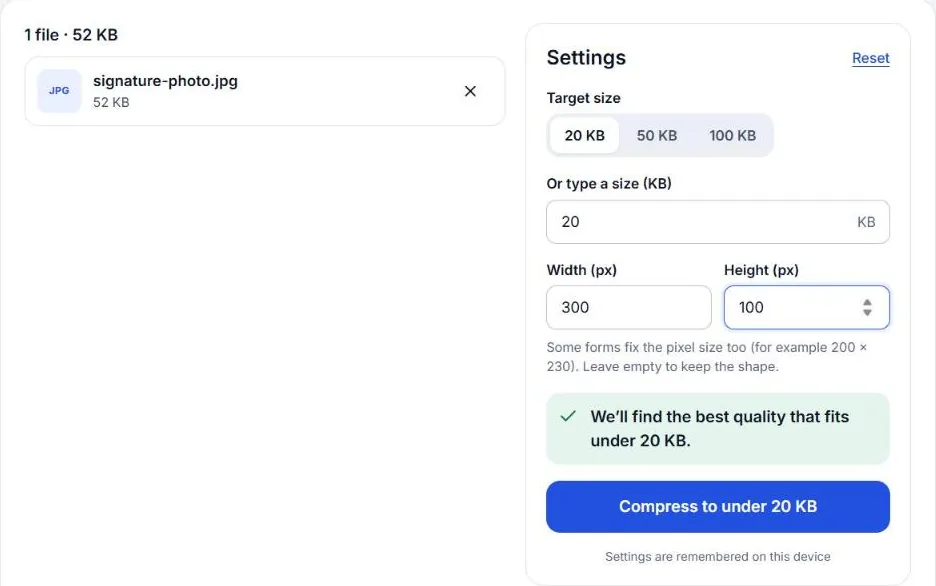
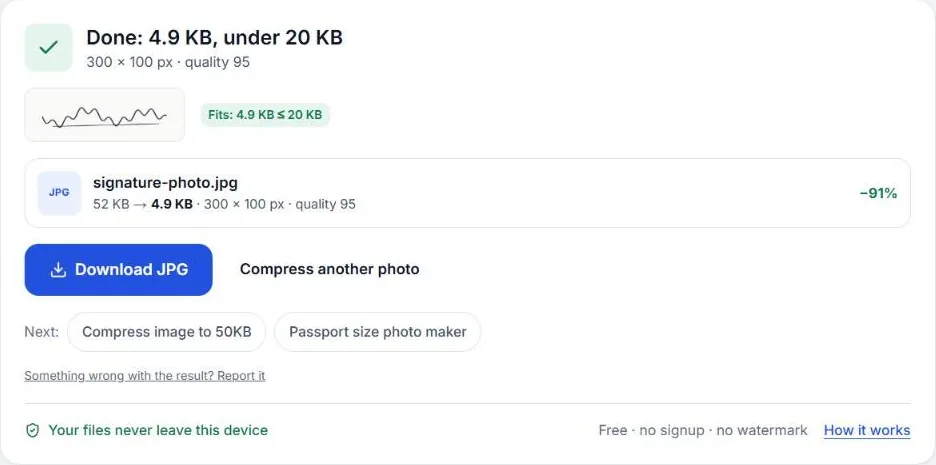
Step 4Press Compress. Check the KB and pixels shown against your notice (including any minimum size), then download.
Start with the notice, not a website
Every exam and recruitment body publishes its own rules for photos and signatures, and they change between years. Websites that list “SSC photo size” or “NEET signature size” often copy old numbers, and they disagree with each other. A file that breaks the rules can get your form rejected.
So the first step is always the same: open the official notice for your exam and find the section on uploading photos and signatures. Note down:
- File type (almost always JPG or JPEG)
- Minimum and maximum size in KB
- Pixel or centimetre size, if given
- Background and photo rules (white background, date on photo, no glasses, and so on)
Some exams now take your photo live through the webcam instead of an upload. If your notice says so, you only need to prepare the signature.
Photo: crop first, then compress
- Take a fresh photo against a plain white or light wall, facing the camera, in even light.
- Crop it to a passport-style frame with your face filling most of it. Crop image has a 3:4 ratio and an exact-pixels option. For a printed passport photo use the Passport size photo maker.
- Compress to the limit. If the maximum is 50 KB, use Compress image to 50 KB; if it’s 20 KB, use Compress image to 20 KB. They search for the highest quality that fits, so the photo stays as clear as possible.
Signature: sharp lines at a tiny size
Signatures usually have the smallest limit. To keep them readable:
- Sign with a black pen on plain white paper. Blue ink and lined paper look muddy when compressed.
- Photograph it straight from above, in daylight.
- Crop tightly around the signature, leaving a little white space.
- Set the pixel size from the notice (if any) and compress to the KB limit.
Hitting a KB range, not just a maximum
Some notices give a range, for example “between 10 KB and 20 KB”. A tiny file can be rejected just like a big one. If your result is below the minimum, increase the pixel size, or use the next tool up (50 KB or 100 KB) so the file lands inside the range.
Pixels, cm and DPI
If the notice gives centimetres, convert with: pixels = cm ÷ 2.54 × DPI. Many notices assume 100 or 200 DPI; use what yours says. Image resizer can resize in cm directly if you set the DPI.
Before you upload
- Open the final file and check the face or signature is clear.
- Check the size in KB matches the range in your notice.
- Keep the original photo; you’ll need it again for admit cards and later stages.
Common rejection reasons and fixes
| The form says | Usually means | Fix |
|---|---|---|
| File size too large | Over the KB maximum | Compress to the limit with the matching KB tool |
| File size too small | Under the KB minimum | Use a larger pixel size or the next KB tool up |
| Invalid dimensions | Pixels don’t match the notice | Set exact width and height before compressing |
| Invalid format | PNG or HEIC instead of JPG | Convert to JPG first (HEIC to JPG, PNG to JPG) |
| Photo not clear | Too dark, blurry or face too small | Retake in daylight, crop closer, compress less |
Keep a ready set
Exams ask for the same files again and again. Keep a folder with your original photo, your original signature, and the compressed versions named with their size, for example photo-50kb.jpg and signature-20kb.jpg. Next time you only need to check the notice and pick the right file.
Questions
What size should my photo and signature be?
It depends on the exam and changes between years, so use the numbers in your own official notice. Notices usually give a KB range (for example 20–50 KB) and sometimes pixels or centimetres.
The form says the file is too small. Why?
Many forms have a minimum size too. If your file is under the minimum, use a larger pixel size or the 50 KB or 100 KB tool so the file lands inside the range.
How do I convert cm to pixels?
Pixels = cm ÷ 2.54 × DPI. At 100 DPI, 3.5 cm is about 138 pixels. If the notice only gives cm, use Image resizer with the cm option.
Is my photo uploaded to your site?
No. Resizing and compressing run in your browser, so your photo and signature stay on your device.
Compress image to 20KB, free and private
Signatures and forms. Runs in your browser; nothing is uploaded.